Take it Outside


@CHEFKELLYCAHOON
“When it comes to food, I can be very extra,” she laughs. “But extra is so fun! And it makes for such a fun event. So I’m sorry but I’m not sorry, and I don’t think anyone who eats the food is sorry either.”
When Kelly treated her friends and family to a gorgeous seaside meal on the beach in San Diego, they were wowed by her thoughtful touches, luxe ingredients, and easy-to-use tips. Even more incredible? Kelly pulled everything together in just a few hours. And you can do the same.
HERE’S HER GAME PLAN FOR CREATING LOVELY AL FRESCO DINING EXPERIENCES All SEASON LONG.
PLAN TO MOVE
“The biggest thing when you’re planning a menu is to do something that is easily transportable and easy to put together once you’re at your destination,” Kelly says. “Think about menu items you won’t need serving utensils, or even a knife, to enjoy.”
For her meal, Kelly created dishes that could be held instead of cut. That opens up plenty of location options too. “You don’t want to make food that you need to eat while sitting at a table,” she says. “Make handheld items that will be easy to eat outside.”
Grab-and-go individual portions also eliminate lines at the serving table and reduce the chances of spilling or tipping plates that have to be balanced on the lap. And, as mom-of-four Kelly points out, kids can grab what they need so parents don’t have to be on plate-making duty.


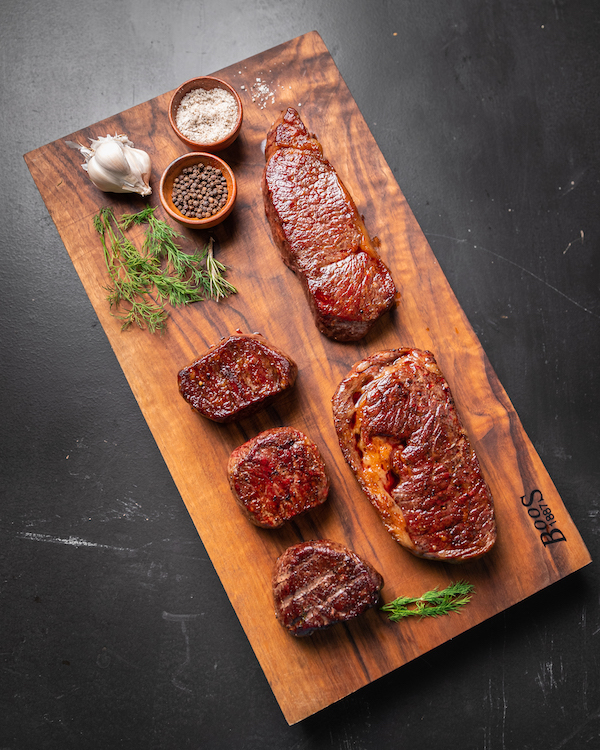
California Tri-Tip Sandwiches with Avocado and Chimichurri
Tender, grilled American Wagyu tri-tip on a bed of avocados and arugula, smothered in grainy mustard and red pepper jelly and hugged between soft and chewy flat bread. The sandwich you didn’t know you were missing is about to be your new favorite.
INGREDIENTS
1 SRF American Wagyu tri-tip
1 full loaf of flatbread
3 ripe avocados, sliced
6 tablespoons chimichurri
3 tablespoons red pepper jelly 3 tablespoons grainy mustard 1 cup arugula
Flake salt and pepper
1 tablespoon duck fat
TRI-TIP MARINADE
1 cup avocado oil
¼ cup coconut aminos
¼ cup Worcestershire sauce
4 garlic cloves, smashed
3 tablespoons dark maple syrup ¼ cup balsamic vinegar
CHIMICHURRI
1 shallot, minced
3-4 garlic cloves, minced
1/2 cup red wine vinegar
1 teaspoon salt
1/2 cup cilantro, finely chopped 1/2 cup parsley, finely chopped 3/4 cup avocado oil
PROCESS
Combine all the ingredients for the marinade in an extra-large plastic bag or bowl. Add the tri-tip and marinate in the refrigerator for 2-3 hours.
Remove the tri-tip from refrigerator 30 minutes before cooking.
Set smoker to 225°F.
Smoke the tri-tip for about 1 hour, or until the internal temperature is 120°F for medium rare. Remove the steak from the grill and let rest. Heat a cast iron pan on high. Place the duck fat in the bottom of the cast iron, and sear the tri-tip for 3 to 4 minutes per side, until internal temperature is 130-135°F and a good crust has formed. Let rest, tented in foil, for at least 10 minutes before slicing very thin against the grain. Set aside.
Using a serrated knife, slice the flatbread in half lengthwise (if you can’t find flatbread, ciabatta is the next best option). Cover the base of the bread in grainy mustard and the top side in pepper jelly, spreading all the way to the edges. Place the freshly sliced avocado slices in a layer, covering the base of the bread, and sprinkle with
flake salt and pepper.
Cover the avocado with a handful of arugula, and top the arugula with a thick, double layer of the thinly sliced tri-tip. Place the tri-tip layers in opposite directions to make them easier to bite into and
to give your sandwich girth and height.
Spoon a liberal amount of chimichurri over the steak and cover with the top half of the flatbread.
Slice and serve.

Open-Faced Lobster Roll with Orange-Chive Créme Fraiche and Caviar
A thick, grilled Texas toast slice with a tangy and fresh base of orange-chive crème fraîche, covered with a blanket of micro greens, piled high with fresh lobster, and finished with a touch of caviar. You’re about to be the most popular person at the potluck.
INGREDIENTS
2 6-7 oz. Maine lobster tails, thawed
4 slices Texas toast
1/2 cup crème fraîche
1 orange, zested and juiced
1/4 cup fresh chives, chopped
Flake salt and pepper
1/2 cup microgreens
1 tablespoon caviar

PROCESS
To prep the lobsters, cut straight down the middle of the shell all the way to the fin. Open the shell to reveal the meat. Set aside.
Bring a large stockpot of salted water to a boil.
Reduce heat slightly, keeping the water at a gentle boil. Add the lobster tails, and boil until they are bright red and their meat turns white and tender. Each tail should take about 6-8 minutes. Do not overcook.
Remove the tails and place them in ice water. Remove the shell completely, dry, and chop the meat into bite-sized chunks.
In a small bowl, whisk together the crème fraîche, orange zest (save some for garnish), orange juice, minced chives, salt, and pepper. Set aside.
In a medium bowl, toss the chopped lobster meat with a tablespoon or two of the orange-chive crème fraîche until well coated but not wet.
Heat a cast iron pan over medium high heat. Place 2 slices of Texas toast on the cast iron, and grill about 5 minutes.
Flip the toast and grill for an additional 2-3 minutes until golden brown. Repeat with the last 2 slices.
To assemble, place a slice of Texas toast on a plate. Spoon a generous amount of the orange-chive crème fraîche onto the base of the bread. Cover with a handful of microgreens, and top with a heaping spoonful of the lobster mixture on each slice. Spoon a bit more orange-chive crème fraiche over the lobster, and spoon small servings of caviar over the top. Sprinkle with more orange zest and a pinch of flake salt.
SERVE IMMEDIATELY AND ENJOY!
Menu planning is also your chance to take advantage of the most bountiful part of the year. Think in terms of color, texture, and taste.
“Using seasonal fruits and veggies is key when you’re deciding how to create your menu,” Kelly says. “With every menu, I try to do at least one fruit dish, one veggie, a few entrées, and then two desserts. Have enough variety so there are dishes everyone will like, plus a few kid-friendly options.”

TAP YOUR FAVORITE RESTAURANT

There’s no reason you have to come up with every dish yourself. “Don’t be afraid to grab your favorite dish from a restaurant,” she says. “I knew I wanted to serve pavlovas, but they take a minute to cook, and I didn’t want to deal with that. So I just ordered 10 pavlova shells from this really cute bakery down the road.” She also tapped a local bakery for the bread and sourced her favorite strawberry-champagne vinaigrette from a restaurant. Buying ahead sparked her creativity too.
“I wanted to do a fun take on s’mores,” she says. “I got the idea to buy waffle cones that had already been dipped in chocolate. I bought softball-sized marshmallows on Amazon, let the kids toast the marshmallows on the fire, and stuck them into the cones. It’s handheld and way less messy than traditional s’mores. I’m calling them s’mones. It was a really easy dessert that I didn’t actually have to make a single thing for.”
PRO-TIP: BUY PRE-DIPPED CHOCOLATE WAFFLE CONES FOR AN EASY, LESS MESSY S'MORE.


Peach Caprese Sliders with Fresh Basil and Fig Balsamic Sauce
Toasted brioche rolls hug juicy American Wagyu patties, melty buffalo mozzarella cheese, fresh basil leaves, and a sweet and tangy fig balsamic sauce — a bite–sized classic, elevated.
INGREDIENTS
8 SRF American Wagyu sliders
Avocado oil for pan
8 brioche rolls, sliced in half
8 mozzarella slices, thick-cut 2 peaches cut into 8 rounds 16+ large basil leaves
1/2 cup fig balsamic dressing or balsamic reduction
Flake salt and pepper
PROCESS
Heat grill or cast iron pan on high heat. Slice the brioche rolls in half, and grill or toast the underside until golden and toasty. Flip to the outside of the rolls, and grill until just toasted. Set aside.
Season the meat patties with salt and pepper, and grill on an oiled cast iron pan for 5 minutes. Flip the patties over, and top with the mozzarella slices.
Cook an additional 5 minutes, covering the slices for the last
2-3 minutes to melt the cheese.
Add the sliced peaches to the grill, and cook for 5 minutes until tender.
Stack the grilled peaches, 2-3 whole basil leaves, slider patties, and cheese on the base of the toasted brioche roll.
Drizzle with fig balsamic dressing (if you can’t find fig balsamic dressing, combine equal parts fig jam with balsamic reduction), and finish with the other side of the toasted bun. Serve hot.
KEEP IT CONTAINED
One disadvantage of bursting-with-goodness summer fruits and vegetables is they can fall apart easily if not handled properly. Kelly combats this by storing items, like the peaches she used for her pavlova, in separate containers. A salad, which might have wilted in a large bowl, was packed into individual lidded cups with the dressing on the bottom and a fork inserted into the lid — all it took was a few shakes to mix the ingredients with the dressing right before serving.
Speaking of those lidded cups: Kelly bought hers on Amazon as she was planning the menu. She also bought an array of containers in neutral colors, including wax-paper containers and gold foiled pans.
“Instead of bringing all your Tupperware with lids that don’t fit, you can bring pretty, recyclable containers in natural colors,” she says. “They’re great for transporting food, for serving, and for packaging up leftovers. It makes for a really pretty spread without having to haul your dishes, and it keeps everything organized and beautiful.”


PRO-TIP: PREPARE "GRAB AND GO "FOODS THAT ARE EASY OUTSIDE
MAKE IT EASY ON YOURSELF
Prepping might sound like a lot of work, but it will all pay off when you’re able to actually enjoy your gathering rather than rushing around at the last minute. For this moveable feast, Kelly cut and skewered fruit and then packed it away in the fridge until it was ready to transport. She sliced bread for the sandwiches lengthwise so she could add fillings the day of the event. Sides were dealt with ahead of time and so were all the toppings for the burgers.
This is especially important when making individual portions, Kelly says. Instead of bringing a bunch of basil and a ball of mozzarella to the beach, Kelly sliced the cheese and cut the leaves off the basil beforehand so the burgers would be a snap to assemble.
Then she whipped out her permanent marker. “Sharpies are your best friend when you’re taking food on site,” she says. “I label every component and mark down which dish it goes in. Then I put it all in a labeled grocery bag before adding it to the ice chest. It makes it easy to build each dish and transport it. Plus, if you have leftovers, you know exactly where to put the food back.”


Peach & Cream Pavlova with Lemony Mascarpone and Pistachio
A sweet and crunchy mini pavlova filled with tart and smooth lemon mascarpone filling and a mountain of vanilla bean cream, topped with marinated fresh peaches, and finished with crushed pistachios. This dessert is as beautiful as it is tasty. It is an instant crowd favorite.
INGREDIENTS
10 pavlova shells
(or ingredients below)
1 cup heavy cream
2 tablespoon sugar
2 tablespoons vanilla bean paste, separated
8 ounces mascarpone cheese 6 ounces lemon curd
4 ripe peaches, sliced thin with skin on
1 teaspoon fresh ginger zest 1 tablespoon lemon juice
2 tablespoons honey
Zest of 1/2 lemon
1/4 cup crushed pistachios
PAVLOVAS
4 large egg whites
1 cup white sugar
1 teaspoon white vinegar
1 teaspoon cornstarch
1 teaspoon vanilla extract

PROCESS
Preheat your oven to 300°F. Line a baking sheet with parchment paper. In a large mixing bowl, beat the egg whites with an electric mixer until stiff peaks form.
Gradually add in the sugar, one tablespoon at a time, while still beating the mixture. Beat until the sugar has dissolved and the meringue is thick and glossy.
Add in the vinegar, cornstarch, and vanilla extract. Beat again for a few seconds until everything is evenly mixed.
Spoon the mixture onto the prepared baking sheet, making small circles
(about 2-3 inches each) with a hollow center.
Bake for about 1 hour or until just firm and crisp on the outside. Turn off
the oven, but leave them in for another 30 minutes to cool completely before removing them from the oven. Store in an airtight container.
For the marinated peaches, combine the peaches, lemon zest and juice,
fresh ginger, honey, and 1 tablespoon vanilla bean paste. Refrigerate
until ready to use.
Add the heavy cream, 1 tablespoon vanilla bean paste, and sugar to a mixing bowl then whip with an electric mixer until stiff peaks form in the whipped cream. Set aside.
In a separate small bowl, combine the lemon curd and mascarpone until
well blended and fluffy.
To assemble the pavlovas, spoon the lemon mascarpone mix into the hollow center of the pavlovas. Then top with a heaping serving of vanilla bean whipped cream, making sure to keep a well in the base (think mashed potatoes getting ready for gravy). Spoon the marinated peaches into the well, and dust with the crushed pistachios.
SERVE IMMEDIATELY AND ENJOY!
BE FOOD SAFE
On-site dining often involves limited access to sinks, soap, and other meal prep and cleanup necessities. Plus, it can be hot! You’ll want to have a few things on hand to ensure your food is kept cool and you don’t have much to clean up.
Pack hand sanitizer for your guests, and place it within reach. Kelly is also
a big fan of disposable gloves. “You don’t know if you’re going to be able to wash your hands after every dish,” she says. “You don’t want any cross-contamination. But it also makes it really easy to serve. Just take your gloves off and put on a new pair when you need to assemble another dish.”
Ice chests and insulated bags — such as the reusable bags that come with every Snake River Farms order — should be stocked with ice packs or even plastic bottles that have been filled with water and frozen until solid. Insulated bags are also great for keeping food warm, Kelly says.“Insulated bags will save your life, hot or cold,” Kelly says.
Putting together a meal this size, from start to finish, isn’t a massive commitment, Kelly says. “The goal is to have really good food that’s easy to eat and that is not too much work to take to your destination and back,” she says. “Ina Garten says it best: ‘If the host is stressed, everybody’s stressed.’ Make it easy on yourself. You want
to enjoy being out there.”
