IN THE BACKYARD WITH RJL


MY TAKE ON STEAK
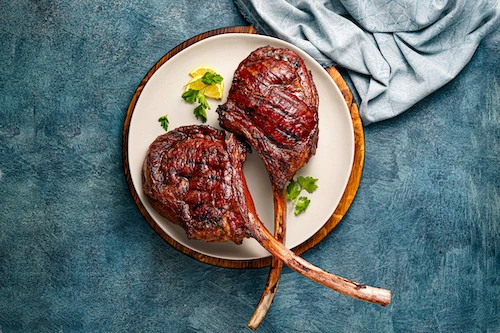
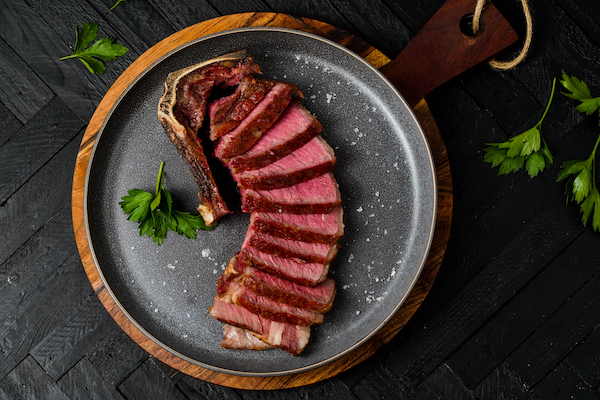
Let’s cut right to the chase. If I’m dying tomorrow, my last meal would be a Snake River Farms bone-in, cowboy cut ribeye. Or any ribeye for that matter. Cooked over open fire, it’s as good as gets. Few things are better than firing a steak on the grill. It’s one of the most relaxing things to do. At least for me it is.
Sure, there are other ways to cook a steak and many of those methods are perfectly fine. I mean, a cast iron steak is phenomenal. If I’m inside, that’s the route I’d take. But grilling a steak over open flames is special. It’s primal and engages all our senses; the sight of the fire, the smell of the beef and the sizzle of rendered fat dripping into the coals. Then there’s the radiant heat on our face. Together, all of it reminds us how alive we are.
Contrary to what many vegans will tell you, we’re carnivores, plain and simple, as fire and meat played a monumental role in our development. Without fire, we’d likely still be hunched over, living more like primates than modern people.
“Fire is a very powerful thing. It’s a sign you’re going to get fed. We are the species that cooks. No other species cooks,” according to Cooked author Michael Pollan.
While archaeologists still debate timing, it’s generally accepted humans began experimenting with fire a million years ago. The earliest known traces of controlled fire are about 790,000 years ago at Daughters of Jacob Bridge in Israel. It took roughly 10,000 more years for those early humans to control fire for cooking. Whether it was 780,000 or over a million years we can all agree this was a gradual process, over a long period of time.


Archaeologists hypothesize that once we started cooking our food, we no longer needed large jaw muscles to chew, and our brains began to expand.
Fun fact: apes spend about 6 hours chewing their food every day. Humans were in the same situation before we harnessed the power of fire. This is why I love cooking on an open flame. It taps into who we really are as people, as humans.
Most of my fondest memories take place in a back yard huddled around a grill or smoker with friends and family telling stories and deciding which steak to cook first. These “tough” decisions are clear indicators you’re just fine in life. The world moves fast. Around the fire, it doesn’t have to. It shouldn’t. This is the time to put the phone down, connect with people, catch up.


These days I cook as often as I can, for as many people as I can. The entire process is therapeutic for me. And there’s no reason it can’t be for you. Starting a fire and cooking steak can be intimidating. But remember, it’s already in your blood. If millions of humans figured it out before you, I promise, you can too.
The first step is to simply start. Once you try grilling, you’ll get more comfortable. And with that comfort comes competency. I’m not a chef and never went to culinary school. I learned by traveling the world and watching some of the best chef’s and pitmasters practice their craft in the wild. Sometimes I screwed up and sometimes I nailed it, but I was always curious, obsessed with improving on every cook. Trust me, you got this. Let’s walk you through the steps and tools you’ll need.
GRILLS – YOU’VE GOT CHOICES
I prefer charcoal grills over gas ones. Food tastes better on live fire. Having a top-of-the-line grill might be your dream. A premium quality grill performs at a high level and lasts a lifetime, but I’m here to tell you, it’s not an absolute necessity. The key, no matter what grill you choose, is understanding the strengths and limitations of each type.
Many dedicated grillers got started with a Weber, an iconic kettle shaped grill that’s affordable, functional and perfectly fine.
Kamados, thick ceramic egg-shaped grills, are a good choice. At home, I use a Kamado Joe, which allows the grills to be separated into different heights from the heat source, if adjustments need to be made.


The PK Grill is a cast aluminum grill that conducts heat efficiently and has precise air control to adjust the temperature.
I’ve also seen an occasional Santa Maria grill which is an open pit style with a grill that can be moved up and down to control cooking temp.
All these grills are suitable for cooking a top-notch steak. The key is learning how to use your grill; how to build a fire, manage the fire and regulate the temperature. Bottom line, whatever the grill, get to know it, intimately.
LIGHT IT UP
Building your fire is an important step to properly cook a steak. I use a combination of charcoal, lump or briquets, and wood chunks when grilling. Charcoal acts as a heat source and the melted fat dripping onto the coals imparts the meat with real flavor. Other factors that play a role in the overall flavor profile are the type of beef, the cut of steak, the seasoning used and the level of the Maillard reaction (the distinctive flavor that results when meat interacts with heat).
You can use a variety of wood chunks to create some smoke, depending on your preference. I tend to cycle through oak, mesquite, pecan or even fruit woods. Feel free to play around with combinations. Just don’t use any conifer-based woods like pine. In fact, never use them for cooking.
A Weber kettle and the PK Grill have a cook surface roughly 4” from the charcoal. This is ideal for searing steak since the distance is short between the meat and the heat source. The challenge is to prevent the outside of the steak from burning from the high heat before the interior is cooked.

One solution is two-zone cooking - build a hot bed of coals to one side of the grill and keep the other side empty for indirect cooking and resting. Using a Kamado style grill can be a little trickier as the heat source can sometimes be up to 18” below the cooking surface. When cooking steak on a Kamado I reduce the amount of charcoal, so the grill is not blazing hot.
Once you build the coal bed so it’s even at the base, add a few chunks of wood. Ensure the surface of the grill is hot enough for searing. If it’s too hot, let it settle. Not hot enough, add more coals or wood.
Aaron Franklin once told me, “If you can put you hand right above the grill for a second or less, it’s hot enough.” That method has worked for me since I can’t use a laser temp gun to gauge the surface.
STEAK-GO FOR QUALITY
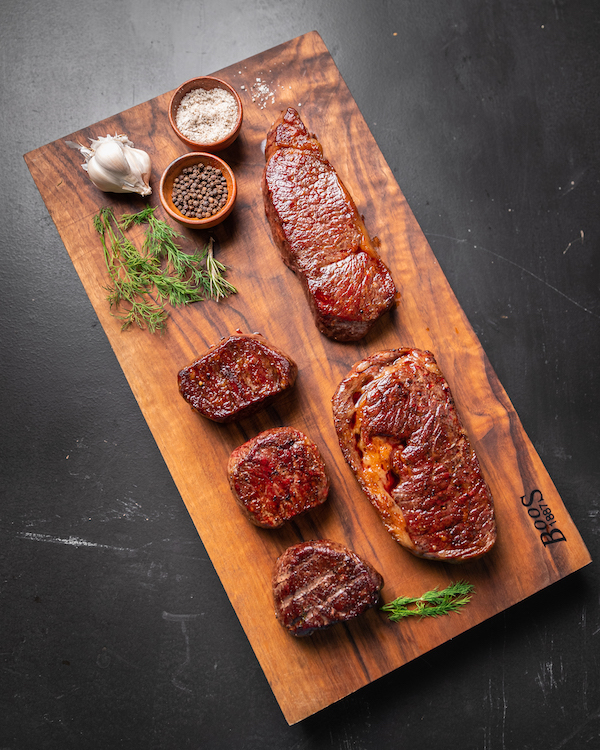
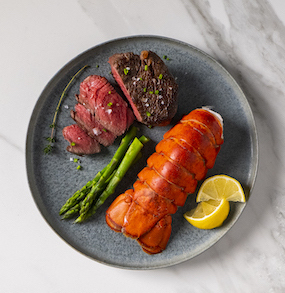
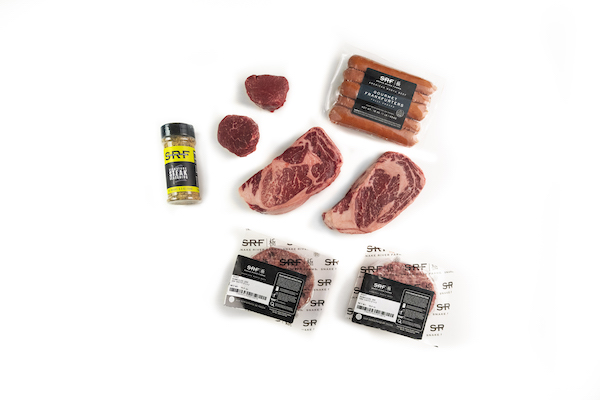
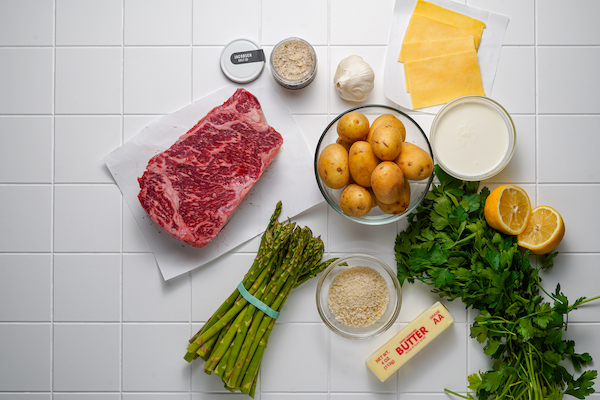
Using high quality beef is equally as critical as knowing how to cook it. And Snake River Farms is as good as beef gets. Period. Of course, everyone has their preference on cut. I’d encourage y’all to go outside your comfort zone. You might be surprised how many different cuts of beef make fantastic steaks. I’ve tried every single cut from Snake River Farms and I’ve yet to have a bad one. You really can’t go wrong with any. Again, explore.

Lately I love picanha, also called the sirloin cap. It’s a phenomenal piece of meat that can be smoked and/or grilled. The level of doneness depends on the cut. To me, a one size fits all approach just doesn’t work. I prefer a little more doneness on fattier cuts, to ensure the fat in rendered versus chewy. There is a little more technique involved in ensuring a robust sear and rendered fat, without overcooking.


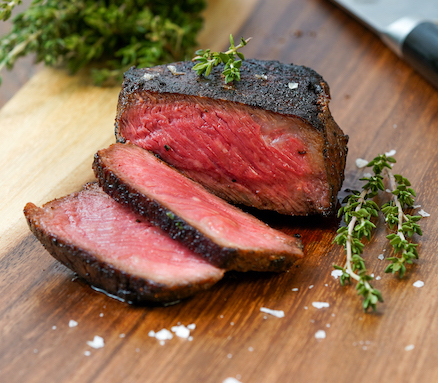
On a filet or leaner cuts, for the most part, I prefer rare. You’ll never see me cook or order well done steak, but if you’re paying for the steak, do what you please. That doesn’t mean I never have. It’s all part of the learning process.


SEASONING
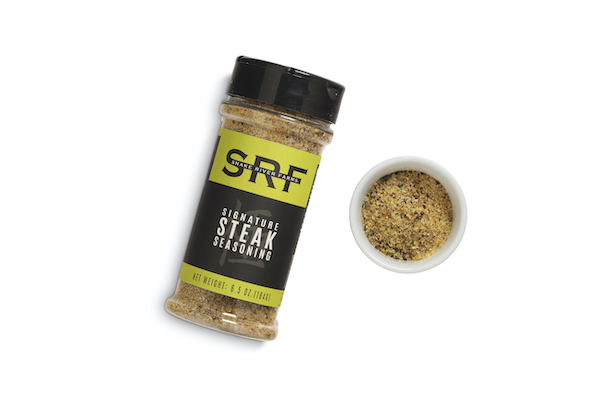
When cooking at home, I prefer simple seasoning. You can use whatever blend or rub you prefer, but I believe in letting the beef be the star. Years and years of work is put into creating the best beef on the planet, so why the hell mask it with unnecessary flavors? With that said, I use kosher salt and dry brine for at least an hour before cooking. When I have time, I’ll salt my steak for as many hours as I can. Sometimes even the day before. The only spices I use are pepper and garlic.


Salt performs two functions: it amplifies the flavor of the meat and impacts the texture, depending on when it’s applied. Salt diffusion, the movement of salt though the cell walls, occurs slowly and takes time to evenly distribute throughout a steak. That’s why I salt my steak as far as advance as possible.
Salt also initiates osmosis which draws water out of the steak and makes it more tender.
“But with time, salt will dissolve protein strands into a gel, allowing them to absorb and retain water better as they cook. Water is moisture. Its presence makes meat tender and juicy,” according to Nosrat Smith, author of Salt, Fat, Acid: Mastering the Elements of Good Cooking.

HOW I COOK A STEAK

Prior to placing your steaks on the grill, make sure the grill is clean using a grill brush. You really don’t want any remnants from prior cooks making their way onto the steak. Tuffy Stone once told me about his thoughts on “seasoned” grills.
“Not cleaning your grill is not seasoning it. It’s just lazy and dirty.” Can’t argue with a World Champion.
I tend to avoid oils with steaks, preferring to use clarified butter. Clarified butter rubbed on the grill functions as a conductor of heat, allows the steak to cook more evenly and helps the meat not stick to the grill. It also has a higher smoke point (about 480°F) versus regular butter (about 350°F).
Baste your steak with more clarified butter and garlic before firing. I use a brush made of thyme and rosemary to add some herbal elements and add some coarse grind black pepper. Pepper loses its oils over time and grinding the day of the cook ensures a higher level of flavor and more assertive spice. I’m a firm believer in using the highest quality seasoning you can access. The last thing I want is to neutralize the beef flavor by using substandard ingredients.


Place the steaks on the grill. How many times to flip? This is a debated point of contention. Some say once, others say more than once.
The goal is a nice, even sear, without over-charring and under or over cooking. Sounds simple. It’s not. But it does get easier with practice.
Initially, I’ll place my steak on the grill then let it cook for 4 to 5 minutes on each side. Then I’ll remove it from the grill, let it rest and check the internal temperature with a digital thermometer. Depending on where you are and what your internal temp goal is, place back on grill and finish.
I like to baste the steaks again with clarified butter and garlic. At this point, I’ll flip more often to ensure even and not overcooking, removing to retemp if need be, until it’s where I want it. On filet mignon, I want 110°F, ribeye’s around 120°F.
When you arrive at your desired temp, remove the steak and place it on a rack to rest. It’s important to allow the meat to relax, allowing the juices to reabsorb and redistribute within the meat, as the heat from cooking causes the juices to concentrate in the center. Allow about 5-10 minutes of rest before slicing or you’ll have juices shooting out. Personally, I’d rather have those juices in the meat, not on the board. Maybe I’m weird.


Now it’s time to slice against the grain, serve and enjoy.
Then do it again.
And again.


